4 Natural Hair Products I Tried and How They Fit My Routine
From fighting flakes to faking fullness, this post breaks down four must-try products every natural hair enthusiast should know. I’m reviewing the Toppik Hair Building Fibers, Wild Growth Hair Oil, Zenia Henna Hair Dye Cones, and the Nizoral Anti-Dandruff Shampoo + Conditioner Bundle—based on real, hands-on experience. If you’re looking for honest thoughts on ease of use, smell, texture, and whether they actually deliver, this is it. Come for the reviews, stay for the tips (and a few laughs). Your natural hair routine might just thank you.
HAIRHAIRCAREHAIRCARETIPS
Everkind
6/3/202519 min read
As a natural hair enthusiast, I’m always on the lookout for products that can make my hair journey easier, healthier, and more fun. Lately, I tried out four very different products that address common needs in a natural hair routine: a quick fix for thinning areas (Toppik Hair Building Fibers), a classic growth aid (Wild Growth Hair Oil), a natural hair dye alternative (Zenia 100% Natural Henna Hair Dye Cones), and a scalp-saving wash duo (Nizoral Anti-Dandruff Shampoo & Conditioner). Below, I’ll share my honest, personal-style reviews of each product – as if I’m chatting with a friend – focusing on how easy they are to use, how they fit into my routine, their texture and smell, and what results you can realistically expect.
Toppik Hair Building Fibers – Instant Thickness in a Pinch
What It Is & Ease of Use: Toppik’s Hair Building Fibers are basically like “hair makeup” made of tiny colored keratin fibers. I was skeptical at first about sprinkling powder in my hair, but it turned out to be a huge confidence booster on days when my curls look sparse at the crown or my edges aren’t as full as I’d like. Using it is pretty straightforward: you shake or spray the fibers onto any thinning areas, and they statically cling to your hair strands and scalp, instantly making your hair look thicker. The product comes in a shaker bottle; I found it works with just the shaker, but for the best results I ended up getting the optional spray applicator tool. With the spray nozzle, I can pump the fibers exactly where I need them (e.g. along a part or hairline) without getting them everywhere. There’s a tiny learning curve – the first time I overdid it and had some excess brown “dust” on my forehead – but I quickly learned that a little goes a long way and that I should apply before putting on my shirt (to catch any stray fibers).
Integration into Routine: I slot Toppik into my routine on an as-needed basis, usually after I’ve finished styling my hair. For example, if I do a twist-out or puff and notice a bit of scalp showing in one spot, I’ll lightly tap or spray on some fibers there. It only adds a minute or two to my routine. A key tip: once the fibers are on, don’t touch or brush that area. I mist a bit of hairspray to set everything in place (this really helps the fibers stay put). Then I’m good to go. The fibers themselves don’t have any noticeable scent and they don’t make my hair feel weird – I actually forget I have it on, which is great.
Texture, Look & Feel: When applied correctly, Toppik looks very natural – even up close, I just see the look of hair shadow, not powder. It doesn’t actually thicken each strand (so my hair feels the same to the touch), but it convincingly hides exposed scalp, making my hair appear fuller. I was impressed that the Dark Brown shade blended perfectly with my hair color (they have multiple colors to match). The fibers are super fine, like microscopic fuzz, so they cling without clumping if you distribute them evenly. If you apply too much in one spot you might see a bit of residue, but using the spray and the little hairline comb (which I tried as well) helps avoid any harsh lines or obvious deposits.
Performance & Realistic Results: Toppik is a temporary cosmetic fix, and it does that job well. It won’t actually regrow or thicken your hair for real (and it doesn’t claim to), but it instantly camouflages thinning areas. The result is I feel more confident wearing my hair out, especially in styles where my scalp would otherwise peek through. I’d say the realistic expectation is that it makes your hair look fuller until your next wash day. Once you shampoo, it all washes out easily with no residue on the scalp. I haven’t noticed any product build-up or clogged pores from it – it seems to just sit on the surface and rinses off clean. One thing to note: Toppik isn’t waterproof. Normal daily wear is fine (it even holds up under light sweat and humidity), but if you get caught in a heavy rain or plan to go swimming, it will likely run or wash out – not a good look. I learned to carry an umbrella just in case! Also, if you sleep with it in, you may see a few fibers on your pillow in the morning (especially if you don’t use hairspray), but it hasn’t noticeably stained my bedding – it brushes off. Overall, I treat this product like I do makeup: put it on when I want that extra boost and remove it at the end of the day. It’s been a game-changer for those moments when I want my hair to look its thickest and most fabulous, with minimal effort.
Wild Growth Hair Oil – Old-School Oil for New Growth
What It Is & Texture/Smell: Wild Growth Hair Oil is a famous staple in the natural hair community – you might recognize the white bottle with green writing. It’s a 100% natural plant-based oil blend that’s earned a bit of a cult following for supposedly boosting hair growth. The oil itself is thick and yellowish. When I first poured it out, it was almost as thick as castor oil, so I knew right away to use just a small amount. The bottle has a pointed nozzle which makes it easy to apply directly to the scalp without making a mess. Now, I have to talk about the smell: it’s…distinct. 😅 To me, it smells herbal and medicinal. The ingredient list includes strong essential oils like eucalyptus, peppermint, and lavender, and you can definitely tell – it’s a pungent, minty-lavender sort of mix. I won’t lie, the scent lingers in your hair. I actually don’t mind it too much (it smells “natural” and a bit tingly), but my family did notice the scent when I started using it. If you’re sensitive to strong smells, this might bother you. Some users even describe it as “awful” or “like a cleaning product,” though I’d say it’s just an intense herbal smell, not a perfumey or artificially fragranced smell.
Ease of Use & Integration: I started incorporating Wild Growth Oil into my routine by using it as a scalp oil a couple nights a week. After washing and while my hair is damp, or even on dry hair mid-week, I apply a few drops directly to my scalp in different sections and massage it in. The nozzle tip makes it easy to get between my coils to the scalp. You truly don’t need a lot – I part my hair in maybe 4-6 sections and squeeze out a line or a few drops in each, then massage with my fingertips. If you apply too generously, your hair will be very greasy because this oil is heavy (plus it could potentially drip down your face/neck and cause breakouts, as some have experienced). Using just a little, I find it soaks in nicely by the next day. I usually leave it in (it’s a leave-in treatment, not a rinse-out) and style as usual. On wash days, I might also use a bit as a pre-poo on my ends. One thing I noticed is that because the oil is thick, it can attract dust or lint over the days – nothing major, but by the end of the week I’m ready to wash and refresh. The instructions suggest you can use it 3 times per week or even more, but I stuck with 1-2 times because my scalp can get oily.
Scalp Feel & Time Commitment: When I massage this oil in, I do feel a slight warm, tingling sensation on my scalp (likely from the peppermint/eucalyptus). It’s not uncomfortable for me – actually feels like it’s stimulating blood flow. The smell also fades a bit after it’s been on for a while, though I catch whiffs here and there. Applying it takes maybe 5 minutes max, so it’s an easy addition to a nighttime routine. I often do it before bed and cover my pillow with a satin scarf or pillowcase (to avoid any oil stains). By morning, my scalp and hair feel moisturized, not wet. Over time, if I use too much, I do feel some build-up, so I make sure to shampoo on schedule. A tip: if the smell is too strong for you, some users mix Wild Growth Oil with another carrier oil or add a drop of a nicer-smelling essential oil. I sometimes mixed it with a lighter oil (like sweet almond oil) to thin it out and tone down the scent.
Results & Realistic Expectations: The big question – does it actually grow hair? I’ve been using Wild Growth Oil for a couple of months now. Here’s what I noticed: My hair did become softer and better moisturized overall. Particularly, my new growth (the hair closest to the scalp) feels healthy and not as brittle. I also experienced less breakage when combing – which can create the appearance of fuller, longer hair over time because you’re retaining length. In terms of actual growth rate, my hair growth didn’t turn superhuman or anything. Hair typically grows about 0.5 inches per month, and I might have seen a slight boost beyond that – perhaps an extra quarter inch over a couple months – but nothing dramatic. Some folks swear this oil gave them inches of growth in a short time; one reviewer claimed 2 inches in 2 months of use. I think results vary a lot person to person. My edges (which are fragile) did fill in a bit where I had some thinning, but again, this was gradual. It’s realistic to use Wild Growth Oil as a supplement to a healthy hair regimen – it can improve hair condition and possibly speed growth a little, but it’s not a magic potion for overnight length. I appreciate that it uses natural oils and I do feel like my scalp is in better shape (less itchy, less flaky) since it’s been well nourished. One downside: the strong smell can stick around, as mentioned, and if you use too much you’ll definitely have greasy, stringy hair. I learned to use it sparingly and mostly on scalp or very dry ends. Overall, I’d say Wild Growth Hair Oil is worth a try if you’re looking to boost moisture and scalp health as part of growing out your natural hair. It’s affordable and one bottle lasted me a long time (the 4 oz bottle was about half gone after two months of moderate use). Just go in with realistic expectations – think “healthier, happier hair” more so than “Rapunzel-length hair overnight.” And be ready for that earthy smell!
Zenia 100% Natural Henna Hair Dye Cones – Nature’s Color (with Some Effort)
Why Henna & Product Format: I’ve been curious about henna for a while as a natural way to color and strengthen hair. Zenia’s 100% Natural Henna Hair Dye Cones caught my eye because unlike traditional henna powders that you have to mix with liquid, these cones come pre-mixed with henna paste and ready to use. That sounded super convenient – no bowl, spoon, or mess of mixing powder and waiting for dye release. The product comes as a set of cone-shaped tubes (like the kind used for henna body art). Each cone is filled with henna paste that’s all natural – no ammonia, no PPD or chemicals according to the label. They’re about 25g of paste per cone. The henna is a reddish-brown color when it stains. I have very dark brown (nearly black) hair, so I knew I wouldn’t get a dramatic color change – likely just a reddish sheen in sunlight, which is exactly what the product description says (on dark hair you get slight red undertones, not bright color). My goals were more about conditioning and strengthening my hair with henna, with maybe a subtle color payoff on a few sun-lit strands.
Application & Ease of Use: Using henna always requires some time and preparation, and the Zenia cones are no exception – but they did simplify a few things. Here’s how my henna day went: I put on gloves (a must, since henna will stain your skin and nails orange). I snipped the very tip of the cone off to open it, and then squeezed the paste out onto my hair. I won’t lie, applying henna from a cone onto hair was a bit unusual. It’s designed for drawing patterns on skin, so it comes out in a narrow line of paste. For doing a full head application, I ended up squeezing big globs out and spreading it with my fingers, almost like icing a cupcake 😅. It might be neater for root touch-ups or doing streaks, but for full coverage I think next time I might squeeze the cones into a bowl first. The paste consistency was impressively smooth – Zenia says they triple-sift it for smoothness, and indeed I had no lumps, which made it easier to saturate my strands. I applied it to clean, dry hair in sections, coating from root to tip. The cone packaging did keep things relatively tidy during application; I wasn’t flying powder everywhere like with DIY mixes. Still, henna is messy by nature – I draped old towels around and ended up with some on my ears and neck (which I wiped off quickly to avoid stains).
Texture & Smell: The paste itself is a thick, muddy texture (as expected), but smooth. It sticks to the hair well rather than dripping, which I appreciated. As for smell, if you’ve never used henna, the best I can describe is an earthy, herbal tea scent – kind of like damp hay or spinach. Zenia’s cones smelled like plain henna with maybe a slight hint of something extra (could be the natural oils they mix in like clove or eucalyptus for preservation). One Amazon user mentioned it smelled a bit like a household cleaner to them, but I personally didn’t get that – it just smelled like nature, which I don’t mind. It’s certainly not a perfumed salon dye smell; it’s more of a “I have a swamp on my head” vibe while it’s on, haha.
Time Commitment: Henna is not a quick process. After application, I piled my thick, goopy hair on top of my head and wrapped it in plastic wrap (to keep it moist and avoid drips). The instructions said to leave it 2-3 hours, or even overnight for best results. I left it on for about 4 hours because I really wanted the conditioning benefits (some people do overnight, but sleeping in it sounded too adventurous for me). During that time, I just did chores and watched Netflix with a towel on my shoulders. Once it was time, I unraveled the plastic and let the henna paste dry out a bit (it hardens and clings to hair). The Zenia instructions for body art henna say to scrape off dried henna without water, but for hair you must rinse it out thoroughly. I went into the shower and rinsed for a looong time. It took several minutes of water and then a gentle co-wash to get all the grainy residue out. My shower looked like a mud scene from a swamp creature movie by the end. 😅 Important: I didn’t use shampoo, because after henna you should avoid shampoo for about 24 hours to let the color oxidize and deepen. Instead I used a lot of conditioner to help slip the paste out and moisturize my hair after. Henna can be drying, so a deep conditioning afterward is a good idea.
Results – Color and Hair Feel: After rinsing and conditioning, I could immediately tell my hair felt stronger and fuller. Henna binds to the keratin in hair, often leaving it feeling a bit thicker or coated (in a good way). Once my hair dried, it was a tad more textured/coarse than usual (henna’s protein-like effect), but after a day and applying a leave-in, it softened up. The color on my dark hair was subtle as expected: in indoor light there was no obvious change, but under sunlight my curls now have a reddish-brown sheen that is actually quite lovely and natural-looking. It’s like a secret dye that only shows in the sun. On any lighter strands or my few grays, the henna turned them a bright coppery orange – henna on gray/white hair comes out very vibrant copper, so be aware of that. Over the next 2 days, the color got a bit darker and richer (henna oxidizes and deepens over 48 hours), which is normal. I’m happy with it because it’s not loud, but gives a warm glow to my hair. If your hair is lighter (light brown or so), you’d probably see more of a reddish brown color payoff.
Realistic Pros & Cons: I consider Zenia Henna Cones a convenient twist on an age-old treatment. The biggest pro is not having to mix powder and wait hours for dye release – these were ready to go, saving me time on prep. The color is completely natural and chemical-free, so I didn’t worry about damage at all. In fact, henna strengthens my hair – after it dried, I noticed significantly less hair shedding when I combed. It’s like a protein treatment and color in one. Another plus: the cones can be stored in the freezer if you don’t use them all (the package suggests refrigerating or freezing unused cones to keep them fresh). I popped my remaining cones in the freezer, so I have henna ready for next time without wondering if it’s expired. Now, the cons or challenges: Henna (pre-mixed or not) is time-intensive and messy. Even with the cones, you need to set aside a good chunk of the day for application and processing. Rinsing it out is a workout. Also, the color results are unpredictable if you’re new to henna – you won’t go from dark hair to blonde or anything (henna cannot lighten, only add red tones). You also can’t choose shades – it’s always some variant of reddish-orange. In my case it was subtle; for someone with lighter or gray hair, it could be very bold. Another honest point: the smell and dryness. My hair smelled like herbal tea for a few days (not awful, but noticeable). And henna can leave hair feeling a bit dry or “wired” – I combated that with a deep conditioner the next day and that helped restore softness. Lastly, once you henna, you’re kind of committed to that color for a while; it’s a permanent stain that gradually fades but will be there until the hair grows out or you cut it. So it’s not like a wash-out dye. For me, Zenia’s henna cones delivered what I expected – a natural hint of color and a stronger hair feel – with the convenience of skipping the messy mixing step. I’d recommend it to anyone comfortable with DIY hair treatments and looking for a natural color boost or conditioning treatment. Just be prepared for the “henna art project” experience and you’ll be rewarded with stronger, happy hair and a unique tint from Mother Nature.
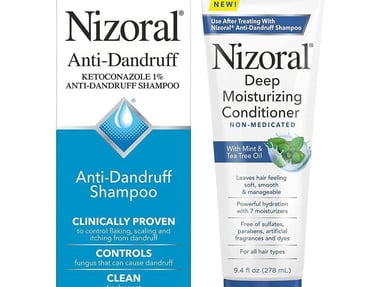
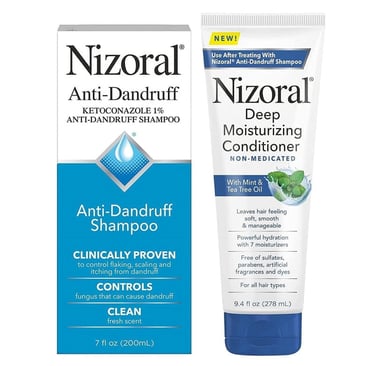
Nizoral Anti-Dandruff Shampoo & Deep Moisturizing Conditioner – Fighting Flakes Without Drying Out
Why I Tried It (Dandruff Woes): Let’s talk scalp care. Even with all the oils and butters we love in the natural hair world, an itchy, flaky scalp can sneak up on us. I occasionally deal with dandruff, especially in winter or if I’ve been heavy-handed with product and protective styles. Many “natural” shampoos weren’t cutting it for the flakes, so I decided to bring in the big guns: Nizoral Anti-Dandruff Shampoo, which is famous for its active ingredient ketoconazole that actively kills the fungus responsible for dandruff. The version I got is a bundle that comes with Nizoral’s new Deep Moisturizing Conditioner (this felt important, because medicated shampoos can be drying, and my curly hair needs all the moisture it can get!). The conditioner is formulated to follow the shampoo without stripping its effectiveness, and it’s loaded with moisturizers plus soothing mint and tea tree oil.
Ease of Use & Routine Placement: Using Nizoral shampoo is a bit different from a regular shampoo, in that you don’t use it every single day. I use it about once a week (the rest of the time I co-wash or use a milder shampoo). On my “Nizoral day,” I wet my hair and scalp thoroughly, then apply a palmful of the shampoo, focusing on my scalp. It lathers nicely – not a super luxurious lather, but enough suds to feel like it’s working. I massage it in for a minute and let it sit for about 3-5 minutes while I sing a song in the shower (or shave, etc.), because the ketoconazole needs a little contact time to do its thing. The shampoo has a light, fresh scent – nothing too strong or medicinal, which I appreciate. After rinsing it out, my hair does feel squeaky clean – a bit too clean on the strands, but that’s expected since it’s effectively a treatment. This is where the Deep Moisturizing Conditioner comes in. I applied a generous amount of the conditioner from scalp to ends. It has a creamy texture, and I immediately felt a cooling, tingling sensation on my scalp from the mint/tea tree – so soothing! I left it on for a few minutes as well, then detangled and rinsed. My hair felt way softer and more supple after conditioning, which was a huge relief (I was worried Nizoral would leave me with straw-like hair, but the conditioner really balanced it out).
Texture, Smell, and Feel: The shampoo’s texture is like a typical gel shampoo with a light blue color. It doesn’t have that strong “anti-dandruff smell” that, say, tar-based shampoos have – instead it’s a clean, slightly medicated scent but very mild (they say “clean fresh scent” on the bottle, which fits). The conditioner is white, creamy, and smells of peppermint/tea tree – kind of like a light minty fragrance. Once my hair was dry, I noticed it actually smelled nice and minty, and my scalp felt refreshed. The combo of these products did not leave any weird residue; in fact, my hair felt very clean but not stripped, which is a difficult balance to strike for a dandruff shampoo. I suspect it’s because the conditioner has seven different moisturizers in it to counteract any harshness. Also, neither product contains sulfates or parabens, etc., so aside from the medicated ketoconazole, it’s fairly gentle on hair color or chemically-treated hair (the label says it’s safe for color-treated and processed hair).
Results & Ongoing Use: After the first wash with Nizoral, I noticed my scalp itching was gone immediately. It really blitzes the flakes and the fungus that cause them. Within two uses (over two weeks) my visible dandruff was practically nonexistent. This stuff is clinically proven to control flaking and itching, and I can see why – it works. The key with dandruff is you have to keep using a treatment shampoo off and on, so I’ve continued to use Nizoral once a week or every other week as maintenance. As long as I do, my scalp stays comfortable and flake-free. If I skip it for a long stretch, I do see a few flakes creep back, so I’d say it’s a maintenance product, not a one-time cure (which is true of any dandruff remedy). One big positive surprise: using this duo didn’t dry out my curls the way I feared. In fact, my hair feels soft and manageable after each Nizoral wash, almost like I did a clarifying cleanse followed by a deep condition (that minty conditioner really does deliver on hydration). The presence of tea tree oil in the conditioner is a nice touch too – tea tree also has antifungal properties and leaves a fresh, clean scalp sensation. The time commitment is pretty normal for a wash day – maybe a few extra minutes to let the shampoo sit, but nothing major.
How It Fits Natural Hair Routine: If you’re mostly doing co-washes and gentle shampoos but struggle with dandruff, integrating Nizoral occasionally can make a huge difference. I treat it like a “scalp reset” clarifying shampoo that I do weekly or biweekly. After using it, I can go back to my regular moisturizing stylers and such, and I find they even absorb better because my scalp is clean and not clogged with flakes or product. One caution: Nizoral’s active ingredient can be a bit strong if overused, so stick to the recommended frequency (2-3 times a week at most, but for me 1x week was enough). Also, while the conditioner is great, you can always follow up with your own deep conditioner if you need extra moisture (I did this once a month just to be extra safe – my hair is very thirst-prone). In terms of negatives, there really weren’t any deal-breakers for me. Some might find the shampoo a tad drying if used alone without the conditioner, and a small percentage of people can be sensitive to ketoconazole (if you notice unusual shedding or irritation, you’d discontinue). I personally had a good experience – no irritation, and actually a calmer scalp overall. The cost of the bundle was reasonable considering I don’t use it every wash, so the bottles last a while. All in all, I’m impressed that I could get my dandruff under control without sacrificing my natural hair’s moisture. This bundle proved you can have a flake-free scalp and soft coils at the same time, which is a win-win in my book.
Final Thoughts & Recommendations
Trying these four products showed me that each addresses a totally different hair need – and they can happily co-exist in a single routine. Here’s how I see them fitting in:
Toppik Hair Fibers: Perfect as a quick fix on styling days when you want extra fullness. It’s like an instant confidence boost for thinning areas – just remember it’s temporary and avoid water (carry that umbrella 😉). I’d recommend Toppik if you have a visible thin spot or sparse edges that bug you, especially for special occasions or photos. It blends in so naturally that no one (not even my close friends) noticed I had “hair powder” on – they just noticed my hair looked good! Keep a light hand and use a setting spray for best results, and you’re golden.
Wild Growth Hair Oil: This is a slow-and-steady product. I’d suggest it for anyone looking to improve their hair’s health and maybe speed up growth gradually. It’s best for thicker hair types (3A and beyond, especially 4C like mine) that can handle a heavy oil. If you have a dry scalp or are doing protective styles, this oil could be your best friend – it keeps the scalp conditioned for days. Just be mindful of the smell and use sparingly. I see it as a nice addition to a holistic growth routine (along with good diet, low manipulation, etc.), not a miracle in a bottle. In my experience, it did help with softness and possibly a bit with growth retention.
Zenia Henna Cones: I wholeheartedly recommend this to natural hair folks who want a chemical-free color change or strengthening treatment, and who don’t mind putting in some time. It’s especially great if you’re craving a tint that won’t damage your curls – henna will actually leave your hair feeling stronger. Just be prepared for the mess and commit to the process. I probably wouldn’t do henna more than once every 1-2 months because of the effort involved, but I love it as a periodic treat for my hair. The Zenia cones made it easier than the traditional method, so if you’ve been scared of henna in the past, these might be a good entry point. Remember the color buildup is permanent on the hair, so start with one treatment and see if you like the shade before doing multiple applications (the red can intensify with repeated use).
Nizoral Shampoo & Conditioner: This combo is a scalp-saver. I’d urge anyone with persistent dandruff or seborrheic dermatitis (those stubborn flakes) to give it a shot. It’s strong on flakes yet surprisingly gentle on hair when you use the conditioner after. For naturals, using a medicated shampoo can be scary, but Nizoral showed me it can be done without wrecking your texture. I wouldn’t use it every single wash – just when needed – but having it in your arsenal means you don’t have to suffer an itchy, flaky scalp. A healthy scalp is the foundation for healthy hair growth, after all. And the fact that the conditioner has no sulfates or parabens and is formulated to preserve the medicine’s effect means they really thought about us hair-care fanatics who don’t want to strip our hair.
In summary, each of these products earned a place on my shelf for different reasons. I love that I can reach for Toppik on a “bad hair day” to instantly fill in my thin areas, or massage in Wild Growth Oil as a nightly ritual to pamper my scalp. On a free weekend, I’ll do a Zenia henna treatment when I’m feeling earthy and DIY-friendly. And when flakes threaten my protective style, Nizoral is there to rescue me without derailing my moisture routine. It’s all about listening to your hair’s needs and picking the right tool for the job. I hope my experiences gave you a clear picture of what to expect from each product – the good, the quirky, and the realistic. Here’s to happy, healthy natural hair, and finding what works for you! 🙌🏾💛